Layering markers and colored pencils is one of the easiest ways to add depth, texture, and richness to a coloring page. On their own, both tools are great. But when you use them together, they can completely change how your finished page looks.
In this guide and the video below, we’ll walk through a few simple ways to combine markers and colored pencils so your coloring feels more dimensional and intentional. You don’t need advanced skills. Just a willingness to experiment.
Why Layer Markers and Colored Pencils?
Markers are fantastic for laying down smooth, even color quickly. Colored pencils shine when it comes to detail, shading, and subtle transitions.
When you layer them together, you get the best of both worlds:
- Bold, saturated base color from markers
- Control, texture, and depth from colored pencils
This combination works especially well on backgrounds, foliage, and areas where you want richer color without overworking your pencils.
Technique 1: Colored Pencil Over Marker for Large Areas
If you’re coloring a large open space, like a sky, ocean, or background, starting with marker can save a lot of time.
Begin by filling the area with marker. This instantly removes the white of the page. Once the marker is dry, layer colored pencil on top to deepen the color and add variation.
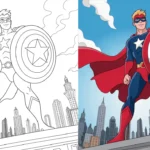
In the video, you’ll see a clear comparison between pencil alone, marker alone, and pencil layered over marker. The layered area has noticeably more depth and richness, especially in darker scenes like night skies or deep water.
Technique 2: Marker as a Base, Pencil for Detail
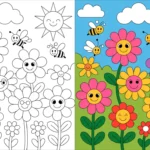
This approach works beautifully for smaller, detailed areas like leaves, grass, or foliage.
Start by coloring the area with a marker in a mid-tone shade. Then use colored pencils on top to add highlights and shadows. Because the marker has already covered the paper, your pencils don’t have to fight the tooth of the page. They glide more easily and blend faster.
Once your shading is in place, you can add fine details with a thin marker if you like. This layered method keeps the area vibrant without looking flat.
Technique 3: Marker Over Pencil for Extra Punch
This is a favorite technique because it adds both color and texture.
Begin by shading an area with colored pencils as usual. Then lightly add marker on top of the pencil. While the ink is still fresh, go back in with the matching pencil and gently move the marker around.
This allows the marker to sit on top of the pencil and even fill in some of the paper’s texture. The result is smoother, richer color without heavy pressure.
Playing With Unexpected Color Combos
One of the most fun parts of this technique is experimenting with color.
In the video, you’ll see an example using tree bark with multiple pencil colors. After the pencils are in place, adding a bright marker on top, like pink or orange, can completely change the mood of the piece. The marker softens into the pencil layers and adds a surprising pop without overpowering the design.
Because the marker is gliding on top of pencil, you don’t need much pressure at all. Let the tools do the work.
Tips for Best Results
- Let marker layers dry before adding pencil
- Use light pressure when layering marker over pencil
- Test color combinations on scrap paper first
- Single-sided pages or thicker paper work best
Final Thoughts
Layering markers and colored pencils opens up a lot of creative possibilities. There’s no single right way to do it. Some combinations will surprise you. Others might not work the first time.
That’s part of the process.
Try different orders. Mix colors. Play with pressure. Over time, you’ll find the approach that fits your style best.
Now that you’ve seen how marker and pencil can work together, it’s your turn. Experiment, have fun, and enjoy discovering what your tools can really do.